Full Refurbishment & Ground Floor Extension
We recently visited this completed project in Twickenham—a compact Victorian terrace that has undergone a full refurbishment and a carefully crafted ground floor extension. The result is a home that feels both grounded and expansive, with light, flow, and materiality at its core.
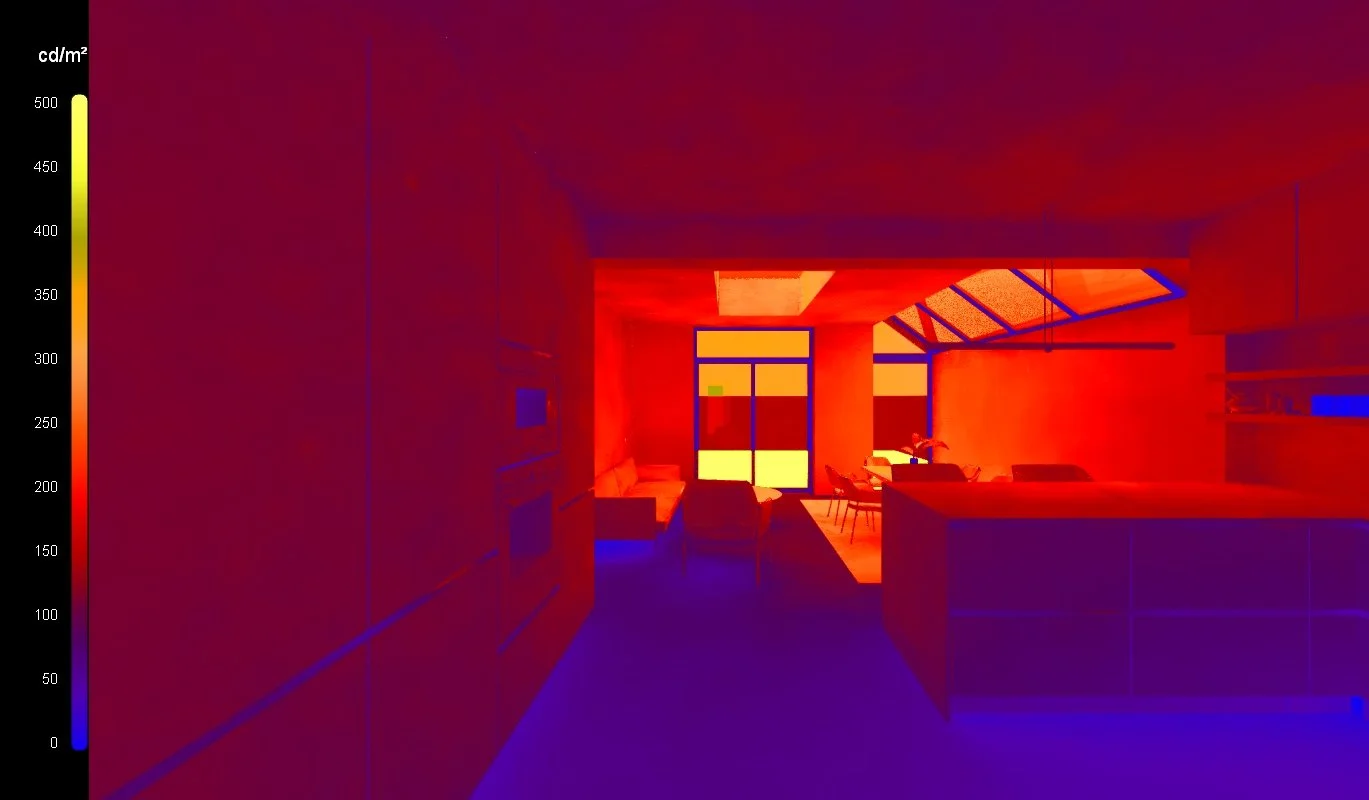
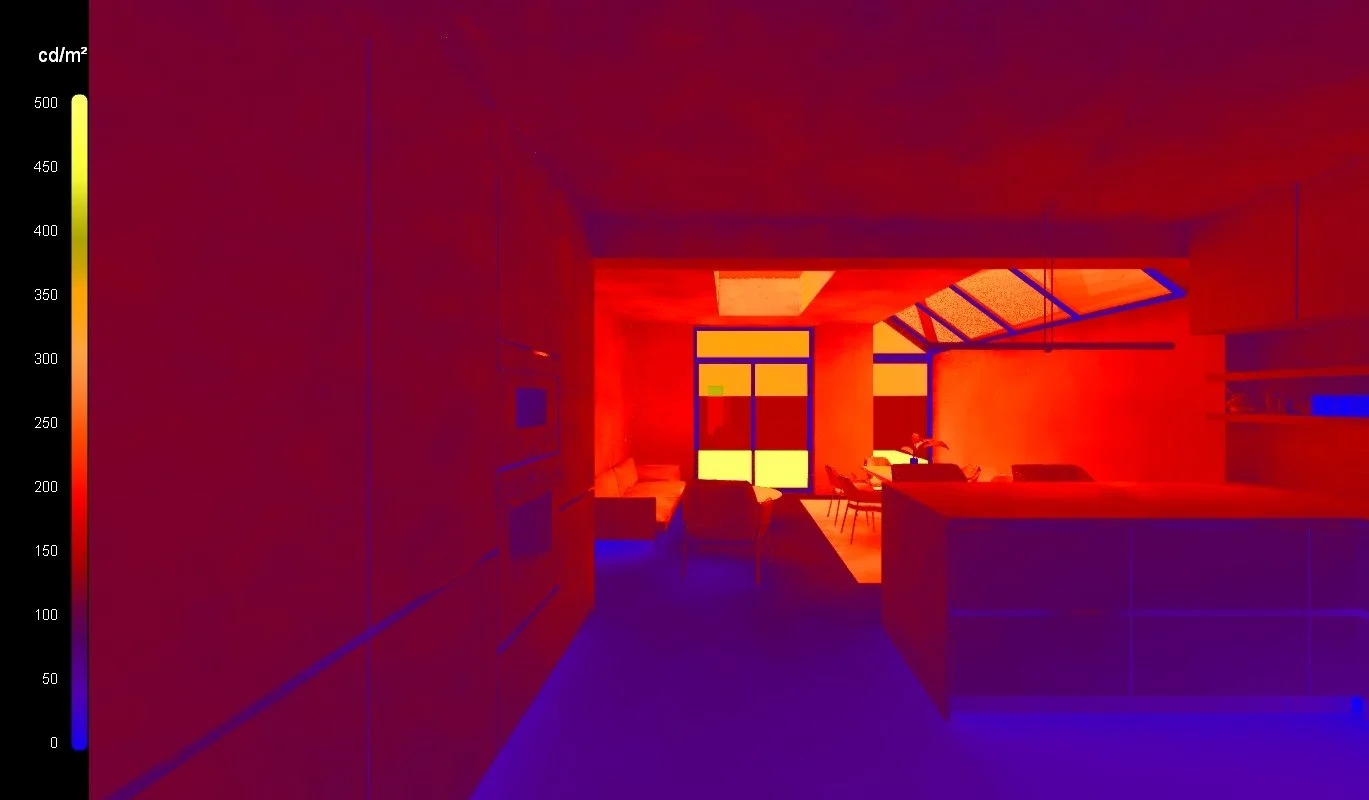
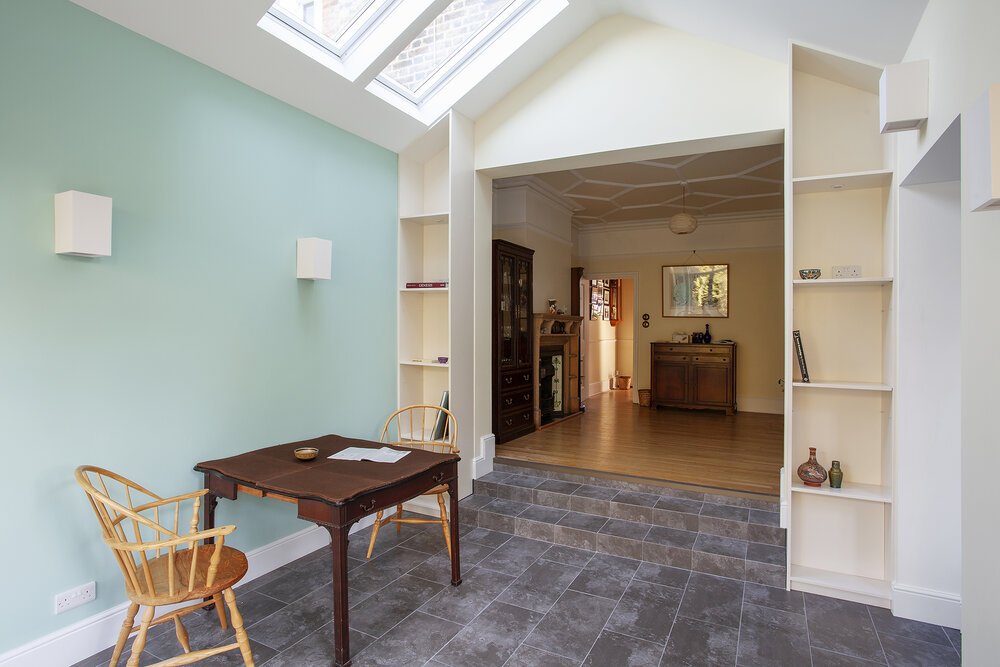
Spatial Strategy: The new extension unlocks flow and functionality, connecting kitchen, dining, and garden with a seamless threshold. A subtle shift in ceiling height and material palette delineates zones without compromising openness.
Daylight Design: Two rooflights and full-width glazing animate the interiors with changing light. The interplay of natural illumination and soft textures creates a calm, tactile atmosphere throughout.
Material Palette: Lime-washed oak, matte black fittings, and composite surfaces balance warmth and restraint. Bespoke joinery integrates storage and display, elevating everyday rituals.
Interior Detailing: The living spaces are curated with layered lighting, tonal contrasts, and sculptural accents. Every detail—from cill height to shadow gap—serves both function and feeling.
This project reflects Square One Architects’ ethos: thoughtful interventions, crafted materials, and a deep respect for light.